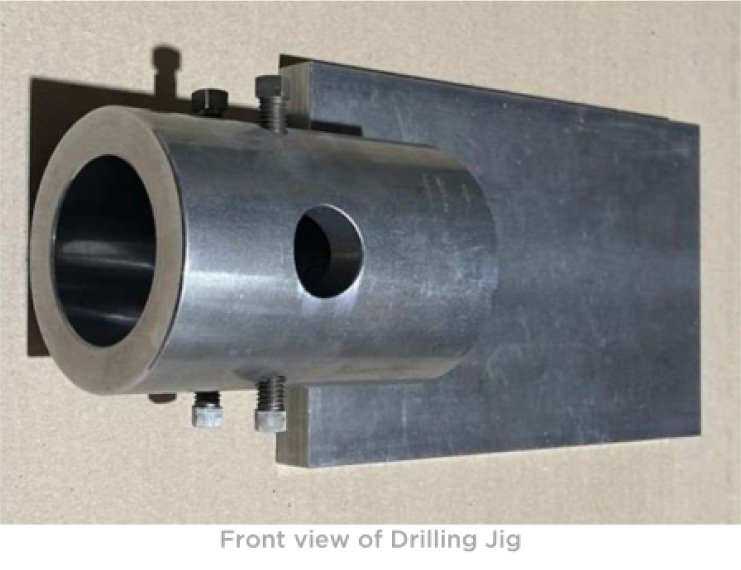
Helical Pile Drilling Jig Instructions
- Product Family HELICAL PILE DRILLING JIG
- Subcategory INSTALLATION TOOL
- TIP Category INSTALLATION TIPS
- Tags Helical Pile, Drilling Jig
TIP Description
The intent of the jig is to properly align a drilled hole perpendicular to the face of a twisted helical pile shaft that is required to be drilled due to the removal of a section of the extension that has the manufactured drilled hole.
References

Procedure
- 1. Install the helical pile per the torque requirements of the project, or other metric as determined by a competent person.
- 2. Considering the thickness of the helical pile termination, the pile shaft should be marked to be cut at the right elevation for the project.
- 3. Using a cutting method that will not detrimentally affect the performance of the steel over time, cut the pile shaft at the marked elevation.
a. The shaft should be cut within a few degrees of perpendicular to the intended (typically vertical) alignment of the pile shaft. - 4. Affix the jig to the shaft sticking out of the ground, roughly aligning the hole of the jig to the face of the helical pile shaft that will be drilled into the face of the helical shaft (reference face).
- 5.Advance the alignment nuts to touch/make contact with the faces to either side (left and right) of the reference face.
- 6. Attach a Mag-Drill with the correct sized cutting bit for the hole to be drilled to the plate surface of the jig, magnetizing it to the plate.
a. Use a 0.875 in annular cutter in Mag-Drill for a 1.50 in square shaft
b. Use a 1.00 in annual cutter in Mag-Drill for 1.75 in square shaft. - 7. Advance the bit into the face of the helical pile shaft, until it fully penetrates the helical pile shaft.
a. A cutting fluid may aid in bit performance. - 8. Determine fitment of the helical pile termination and bolt hole clearance and make any adjustments as necessary.
If you need more assistance…
Please reach out via email at info@intechanchoring.com or at our Office
Phone at (800) 223-7015


